|
|
 |
 |
 |
 |
|
|
| |

Becky! 2 編
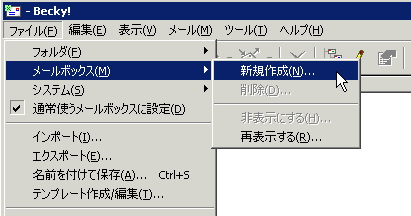
メールアカウントを追加するには以下の手順で行います。
- ファイル→メールボックス→新規作成
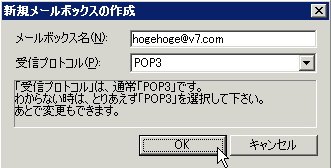
- POP3を選択し、メールボックス名はわかりやすいような名前で設定します。
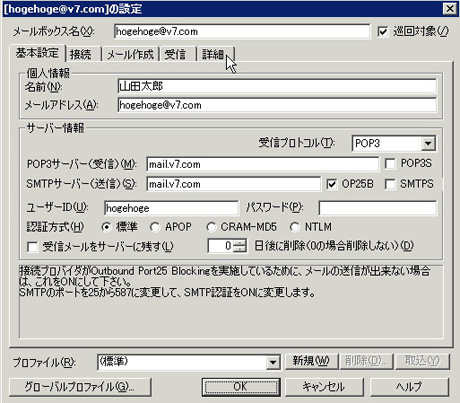
- 「基本設定」タブの画面では、名前、メールアドレスを入力、POP3およびSMTPサーバーは mail.v7.com と入力してOP25Bを選択します。続いて、ユーザー名(ユーザーID)とパスワードを入力したら、詳細タブをクリックします。
- 「詳細」タブの画面では、SMTPのポート番号が587になっていることを確認し、SMTP認証を選択します。
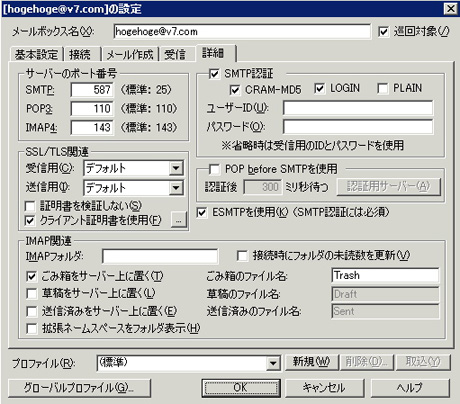
- 以上で完了です。メールの送信・受信ができるかテストしてみてください。
|
|
 |
|
 |
|